How To Prep Concrete For Epoxy: All You Need To Know
Updating and protecting bare concrete surfaces is essential to maximize their functionality and maintain their appearance in the long term. Applying an epoxy coating is one of the most effective solutions for maintaining both the functionality and appearance of concrete floors. Epoxy forms an extremely durable, seamless finish that safeguards concrete from damage while beautifying areas like garages and basements. However, taking the proper steps to prepare the surface beforehand is imperative for ensuring the epoxy bonding and characteristics last for years to come.
Today, we will provide a comprehensive guide on how to prep concrete for epoxy. But first, we will discuss what epoxy is before diving into the preparation instructions. Understanding the material can help you better comprehend and execute each preparation step.
But, before we continue, do you need your concrete parking lot repairs done effectively and efficiently in Southern California? Then, call on us at TMC Engineering ! We’d love to help you with your gravel projects or any other concrete or asphalt work!
How To Prep Concrete For Epoxy
Before getting into the step-by-step instructions for preparing your concrete floor to get a perfect epoxy finish, it’s helpful to first understand what epoxy is and how it works. Epoxy is a hardening compound made of resin and curing agents that chemically bond to concrete surfaces. In learning a bit about this versatile coating material, you’ll gain better insight into why each preparation task is necessary.
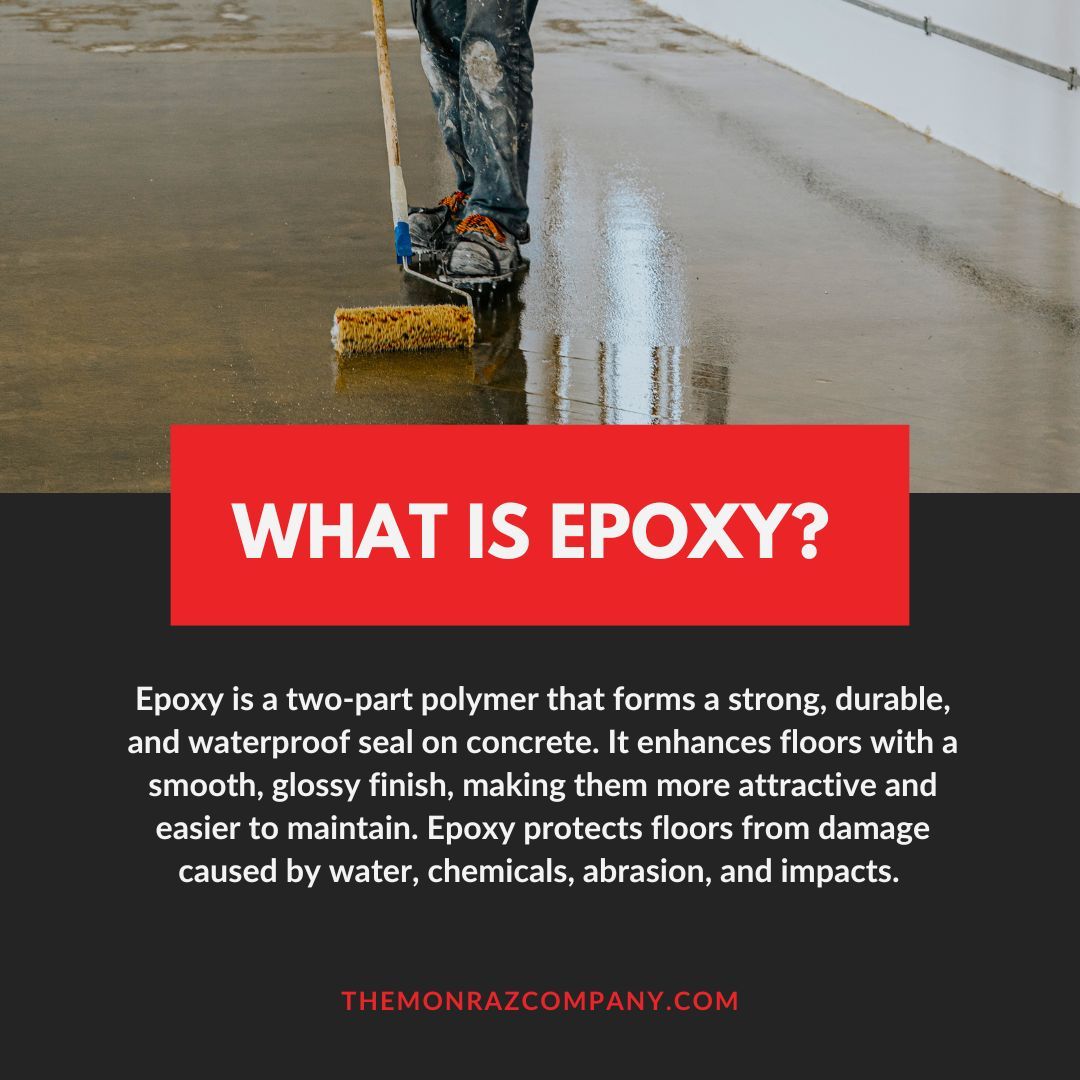
What Is Epoxy?
Epoxy is a two-part polymer system composed of a resin and hardener. When mixed in the proper ratio, these components undergo a curing chemical reaction to form a very strong yet flexible protecti ve seal.
Made from petroleum-based resins and curing agents, epoxy bonds directly to concrete on a molecular level once applied. This creates a non-porous, waterproof, and highly durable surface. Epoxy protects floors from damage caused by water, chemicals, abrasion, and impacts. It stands up to the wear and tear of vehic le and foot traffic much better than bare concrete alone.
Aesthetically, epoxy enhances concrete floors by providing a smooth, glossy finish. It covers imperfections and stains while also making the flooring easier to clean. Whether used in commercial garage floors or residential basements, epoxy coatings transform drab concrete into an attractive, low-maintenance surface. Its stain-resistant properties help keep floors looking new for years.
How To Prep A Concrete Floor For Epoxy
Proper preparation , as we said earlier , is necessary for epoxy to form a permanent bond with the concrete surface. The floor must be structurally sound, thoroughly cleaned, and textured to allow the epoxy molecules to grip the substrate appropriately. Neglecting preparation steps can cause problems like cracking, peeling, or premature wear of the epoxy finish over time.
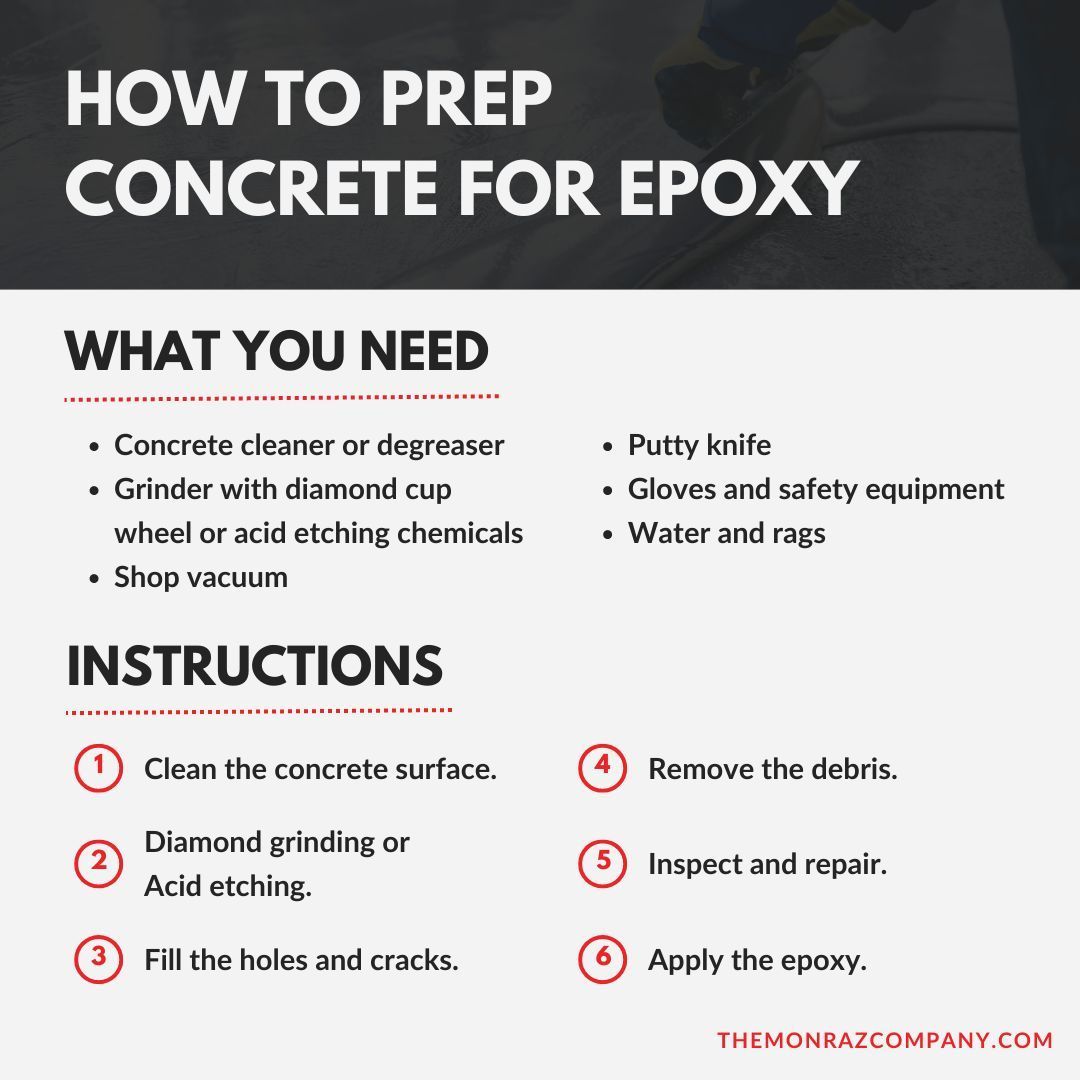
What You Need
- Concrete cleaner or degreaser
- Grinder with diamond cup wheel or acid etching chemicals
- Shop vacuum
- Putty knife
- Gloves and safety equipment
- Water and rags
Instructions
Step 1: Clean the concrete surface.
Thoroughly sweep and vacuum to remove all dirt, dust, and debris from the floor. Use a degreaser or cleaner to remove any oils or contaminants according to label instructions. Rinse and allow to fully dry.
Step 2: Diamond grinding or Acid etching.
This texturizes the concrete for better epoxy adherence. Grind the surface with a diamond cup wheel or etch the surface with muriatic or phosphoric acid . Rinse any acid residual thoroughly.
Step 3: Fill the holes and cracks.
Using a concrete patching compound or epoxy, fill any imperfections in the floor. You can read up on this in our post on how to patch holes in concrete .
Step 4: Remove the debris.
Vacuum and wipe the floor clean of dust or other residue left from previous steps.
Step 5: Inspect and repair.
Check for any remaining imperfections and make any additional repairs to the concrete surface before applying the epoxy.
Step 6: Apply the epoxy.
Follow the epoxy product instructions carefully for best results when applying epoxy onto the prepared floor.
Preparing a concrete floor properly takes time, but creates a sturdy surface for the epoxy to form a strong bond. Neglecting preparation can lead to problems later on like epoxy peeling. Taking the time to thoroughly clean, etch/grind, fill cracks, and inspect the floor pays off in the form of a beautiful, long-lasting epoxy finish.
Proper floor preparation allows epoxy coatings to provide concrete floors with long-lasting beauty and protection.
With the right surface preparation, epoxy becomes a versatile solution for updating plain concrete surfaces like garage floorings. Although the preparation work requires physical labor, the results last for many years with minimal maintenance. A smooth, glossy epoxy coating creates a professional impression. With some simple tools and the steps above, anyone can transform their concrete flooring into a low-maintenance, attractive surface.
Here at TMC Engineering , we have a deep commitment to delivering projects characterized by the highest safety standards as well as workmanship and client satisfaction. We aim to provide you with valuable informative content and insights related to the services our team of experts provides!
Whether you require asphalt paving , striping, sealing , or concrete work , we offer a full suite of transportation construction solutions. Because our team members’ experiences range from 20 to 33 years in this industry, we can work in all weather conditions and have challenged them for our confirmation. We invite you to contact us today for a FREE QUOTE . Let’s make quality projects together!